How to Use a Digital Refractometer for Accurate Measurement?
Using a Digital Refractometer can revolutionize how we measure liquid concentrations. This device offers precise readings that are essential in various applications, from brewing to laboratory analysis. Understanding its operation is crucial to achieving accurate results.
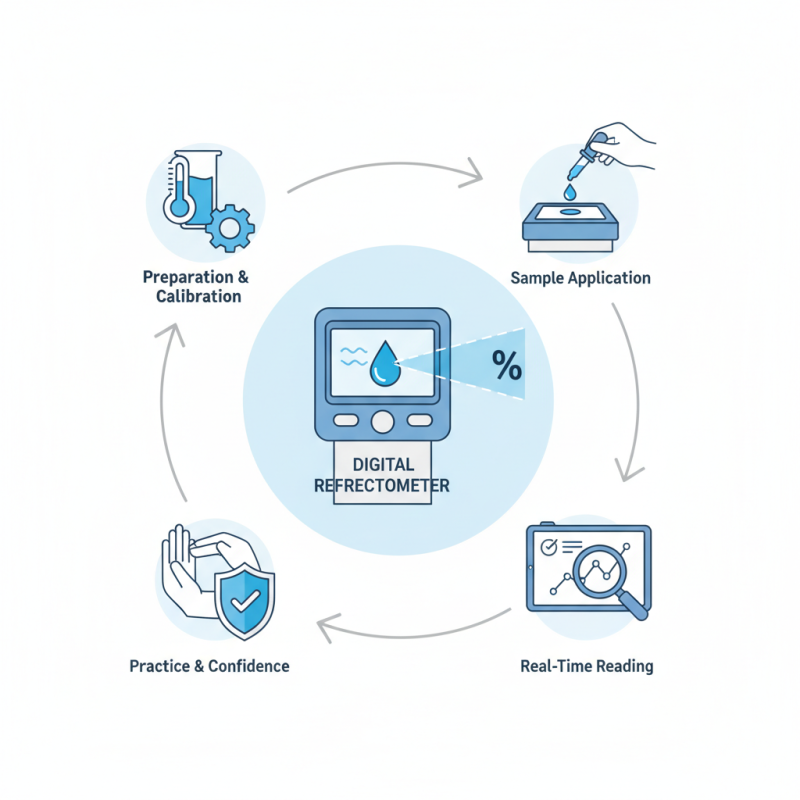
A Digital Refractometer provides real-time data, making it easier to track changes in liquid properties. Users must calibrate the device correctly to ensure reliability. This step is often overlooked but can lead to significant errors. Familiarity with the instrument’s features enhances its effectiveness.
When using a Digital Refractometer, attention to detail is paramount. The sample temperature can influence measurements, requiring careful preparation. As with any tool, practice leads to improved technique, yet initial unfamiliarity can cause challenges. Recognizing these aspects enhances the overall accuracy of measurements and builds confidence in results.
Understanding the Basics of Digital Refractometers
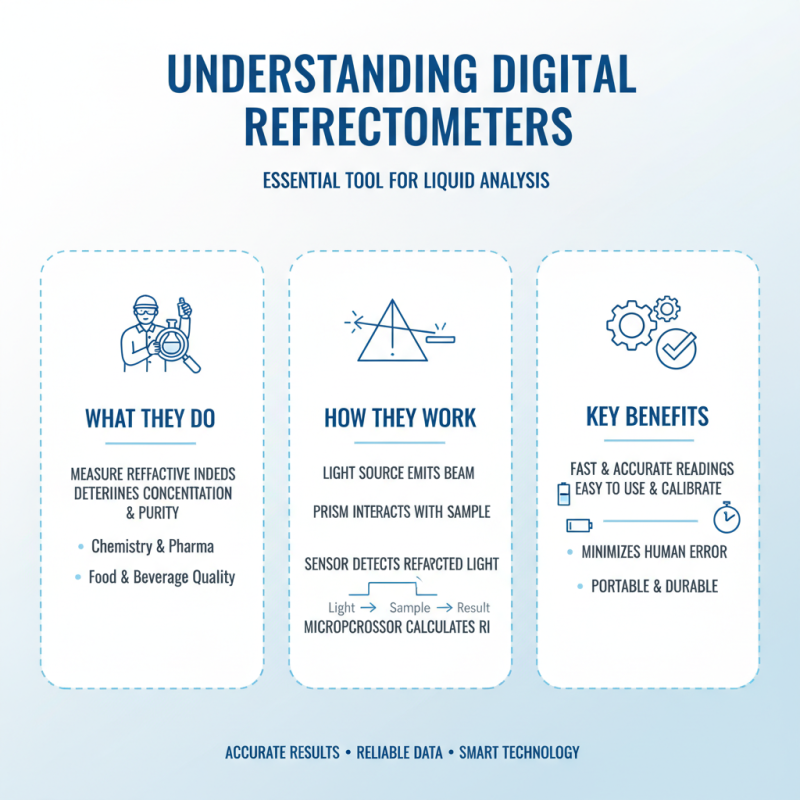
Digital refractometers are essential tools for measuring the refractive index of liquids. They help in various fields, including chemistry, food science, and brewing. Understanding their functionality ensures accurate measurements and reliable results. These devices typically use a light source and sensors to determine the refractive index, which correlates to specific concentrations of solutions.
When using a digital refractometer, calibration is crucial. It should be calibrated regularly with distilled water. This step helps achieve accurate readings. Additionally, ensure the sample is at the correct temperature. Temperature can greatly affect refractive index readings, leading to errors if not closely monitored.
Tips: Rinse the sample chamber with distilled water before taking a measurement. This prevents contamination and ensures purity. Also, keep the device clean; dirt and residue can impact accuracy. Always read the manual for specific operating instructions and maintenance tips. Understanding these basics can enhance your skills in using a digital refractometer effectively.
Setting Up Your Digital Refractometer for Use
Setting up your digital refractometer requires careful attention. Begin by ensuring that the device is clean and free from any residues. Use distilled water to rinse the prism surface. Dry it gently with a lint-free cloth. This step is crucial for obtaining accurate measurements. Contamination can lead to incorrect readings.
Next, calibrate the refractometer according to the manufacturer’s instructions. Usually, you will need a standard solution with a known refractive index. Place a few drops on the prism. Wait briefly and check the reading. It’s important to repeat this process to confirm the accuracy of your calibration. Minor discrepancies might occur, so don’t hesitate to recalibrate if needed.
Once set up, measure your samples. Make sure to take a few readings for consistency. Distractions during measurement can cause errors. A steady hand is essential. Record your findings accurately. After use, clean the device again. This ensures longevity. Regular maintenance prevents buildup, which can affect future results.
How to Use a Digital Refractometer for Accurate Measurement?
| Step |
Description |
Time Required |
Tips |
| 1 |
Calibrate the refractometer using distilled water. |
5 minutes |
Ensure the water temperature is around 20°C. |
| 2 |
Prepare the sample for measurement. |
3 minutes |
Make sure the sample is at room temperature. |
| 3 |
Place a few drops of the sample on the prism. |
1 minute |
Use a pipette for precise sample placement. |
| 4 |
Close the lid and wait for the reading. |
30 seconds |
Avoid direct sunlight on the refractometer. |
| 5 |
Read the refractive index from the display. |
1 minute |
Record the measurement for your records. |
Calibrating Your Digital Refractometer Accurately
Calibrating your digital refractometer accurately is essential for reliable readings. Before you begin, gather the necessary materials: distilled water and a reference standard that matches your expected measurement. Ensure the device is at room temperature. Temperature can affect readings significantly.
When calibrating, zero your refractometer with distilled water. Place a few drops on the prism, close the cover, and note the reading. Adjust the calibration screw until it reads zero. If your refractometer has multiple scales, check each scale individually. Inconsistencies can lead to misleading results.
Tips for accurate calibration: Always clean the prism after each use. Residue can impair readings. Try to perform calibrations in the same environment where measurements will be taken. This helps reduce variability. Also, periodically check against known standards. Even slight deviations can indicate a need for recalibration. Small inconsistencies can have a big impact when measuring precise solutions.
Step-by-Step Guide to Measuring Samples
Using a digital refractometer can seem complex, but it’s straightforward with a few steps. Start by ensuring your device is clean and calibrated. Calibration ensures accurate readings, so do this regularly.
When measuring a sample, place a few drops of the liquid on the prism carefully. Avoid air bubbles; they can distort your reading. Gently close the cover to create a seal. Wait a moment for the reading to stabilize. It'll display the refractive index or Brix percentage, depending on your needs.
Tips: Always ensure that your samples are at the right temperature. Temperature variances can affect the results profoundly. After each use, clean the prism thoroughly. Any residue left on the prism can lead to errors in future measurements. Remember, sometimes readings may fluctuate. Double-check by measuring the same sample multiple times for better accuracy. This practice can help avoid potential errors and improve your technique.
Digital Refractometer Measurements of Various Solutions
Interpreting and Using the Measurement Results
Using a digital refractometer involves understanding the measurement results effectively. Accurate readings depend on proper calibration and technique. When light passes through a sample, the refractometer determines the refractive index. This value is then converted into concentration units, like Brix or specific gravity. Ensuring a clean sample is vital. Any residue can lead to skewed results.
Interpreting results can be challenging. A higher refractive index typically indicates a more concentrated solution. However, variations can occur due to temperature or sample impurities. When assessing your results, consider these factors. If a reading seems off, it’s worth double-checking your method. Consistency is key in achieving reliable outcomes. Gaps in measurement can signal a need for adjustment.
Lastly, be open to learning from your measurements. Each experiment provides insights, even the unexpected results. Over time, you'll refine your technique. This skill is developed through practice and analysis. Embrace both successes and mistakes for better accuracy in the future.